
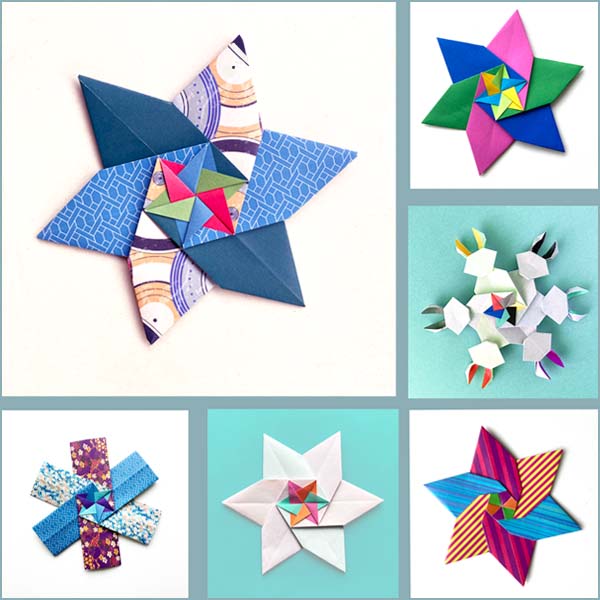
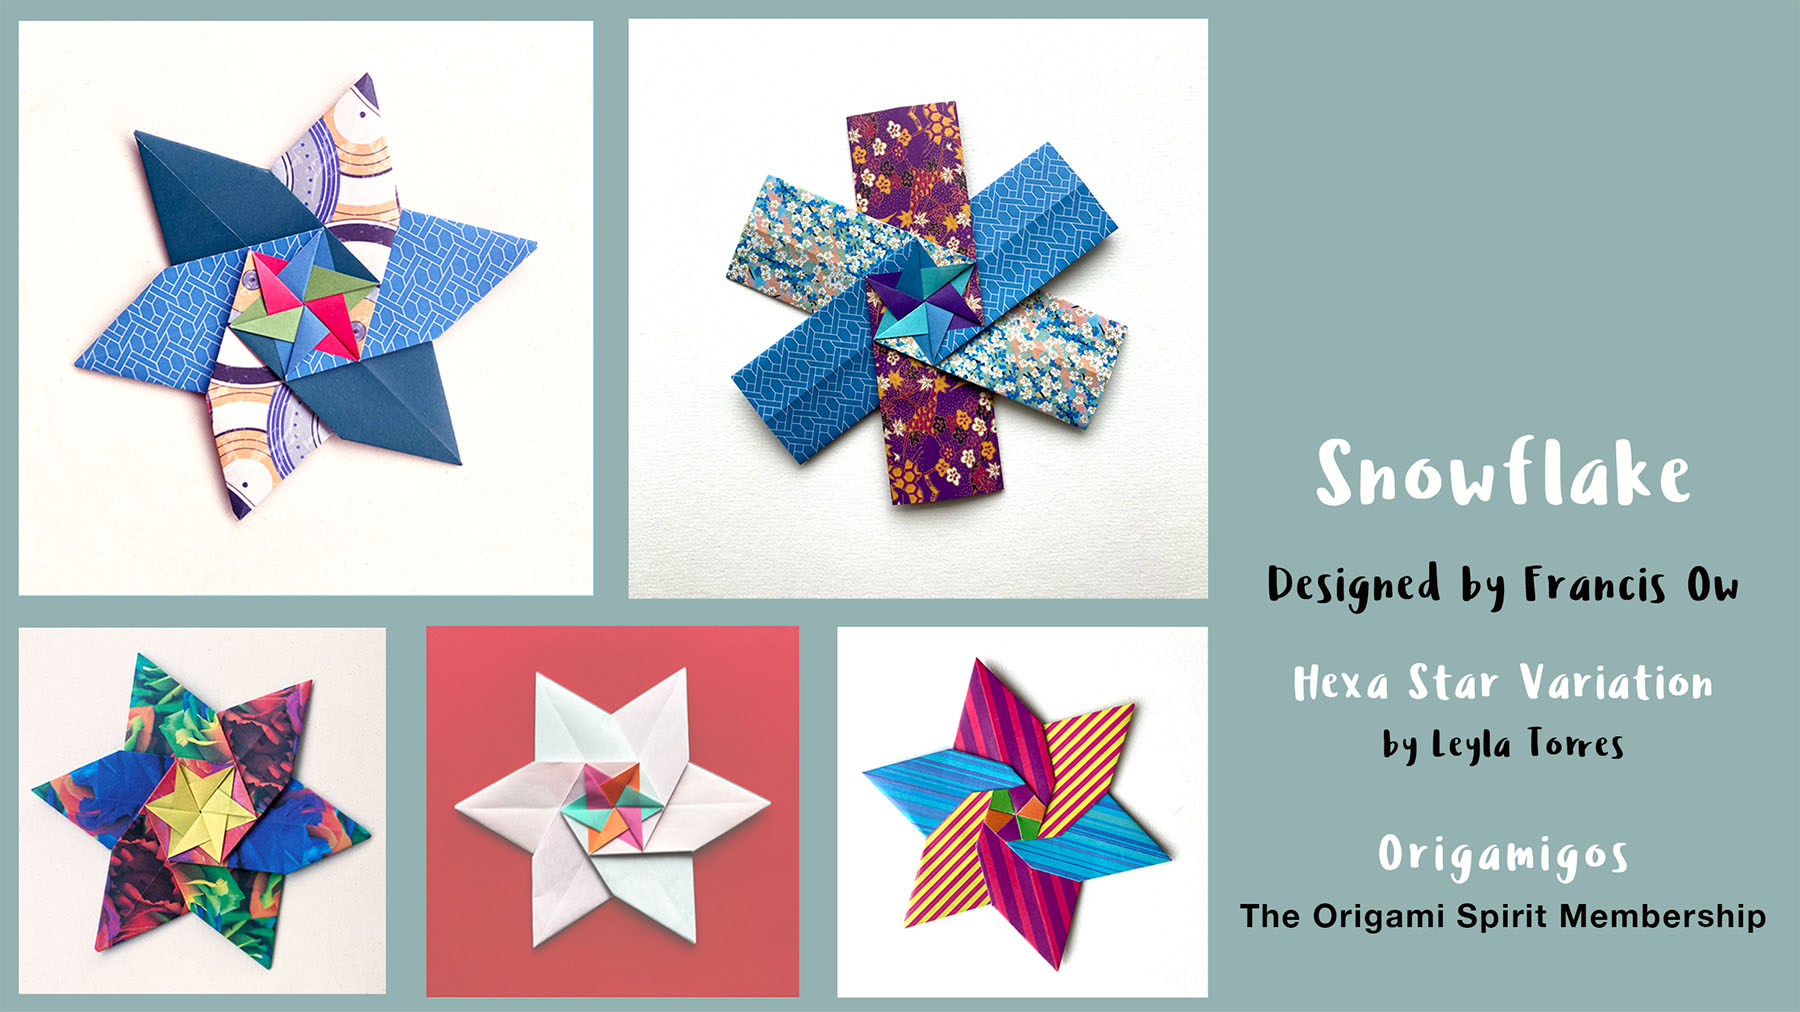
In the video presented here, you will learn how to fold this lovely modular origami “Snowflake” designed by Francis Ow (Singapore). This elegant six-pointed model offers endless possibilities for creativity through paper selection and color combinations.
Using Francis’ snowflake as a point of departure, I turned it into a hexagonal star, a flat model perfect for holiday mailing and sharing.
In the video you can see a modifications and ideas on different paper combinations for various looks.
Origami terms to note:
- Modular Origami Also known as Unit Origami is a paper folding technique that uses two or more sheets of paper to create a piece.
- Tab: a small flap of paper used to hold and secure one or two pieces of a model together.
- Pocket: A compartment providing a space in which a flap is inserted to secure two pieces of a model together.
Tips and suggestions for making the Modular Origami Snowflake and Hexa Star
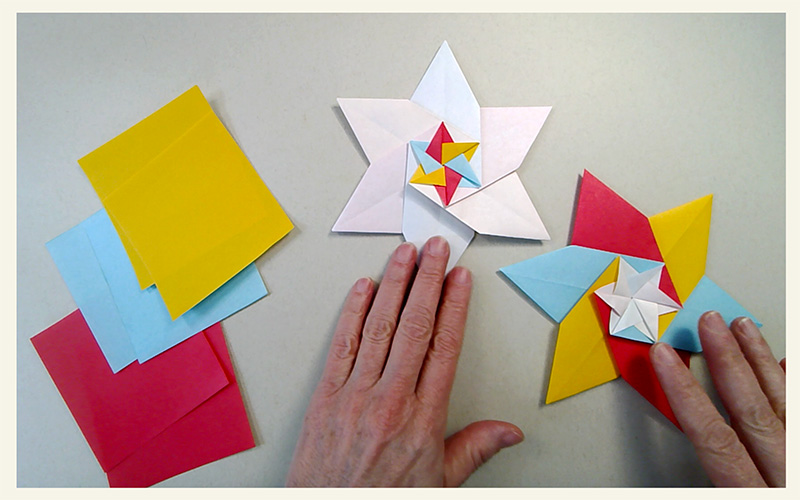
- Use SIX (6) square pieces of paper. When making it for the first time, have coordinating colors (3 sets of 2 squares of the same color -see photo below).
- To adequately visualize the folding landmarks, solid colors are recommended to make your first star.
- Paper size 6 x 6 inches (15 x 15 cm) or smaller. The stars in the photo below were made with smaller paper (3 x 3 inches – 7.5 x 15 cm)
- Thin and crisp paper such as Kami paper* works well.
- When choosing colors, keep in mind that both sides of the paper are visible on the finished piece.

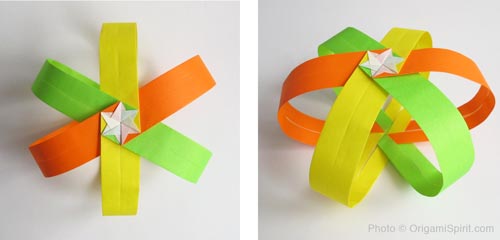
If you are at the Apprentice Bee Stage (Stage 1) Make sure that you are comfortable with the basic mountain and valley terms demonstrated in the Origami Basics Mini-Course. As a preliminary practice to make a modular piece, you might want to fold the Magic Origami Star. Watching the video tutorial for the Snowflake at least once before you make an attempt to make it will help you ease your mind into the folding process. The modules are easy to make but joining them together might be challenging.

If you are at the Emergent Frog Stage (Stage 2) Keep in mind the previous recommendations for Stage 1. As a preliminary practice here is a video for a Modular Accordion Box that you might want to try as an exercise. Try the folding sequence using plain (not patterned) copy paper. Your first attempts at folding this modular snowflake should be made with paper no smaller than 3 x 3 inches (7.5 x 7.5 cm) so that you can easily maneuver the modules in your hand to join them. Remember that patience and persistence are your best friends!

If you are at the Competent Goldfish Stage (Stage 3) Keep in mind the suggestions for the previous stages. Begin by experimenting with the papers you have at hand, but open yourself to getting different kinds of patterned papers with different color on each side. Also, consider coloring your own papers. How to color paper: Coloring Paper tutorial -Origami Spirit and Coloring Paper Tutorial Happy Folding.

If you are at the Ambassador Cat Stage (Stage 4) Keep in mind the suggestions for the previous stages. Try making stars with different sets of papers. For example, use six different colors, all white on the back. Alternate sets of three papers. Try creating this model with six identically patterned pieces of paper for a caleidoscope effect. Fold it with foil paper on both sides for a holiday ornament.

If you are at Pioneer Owl Stage (Stage 5) Be mindful of how you present and photograph your finished models. For best origami photo results make sure that your background is uncluttered, plain, and neutral in color. Avoid reflective surfaces. Photograph your piece in indirect daylight. Overcast days and placing your model near a window are the best! Have you taught this model to a friend? Remember that “teaching is to learn it twice”.
Creativity Idea
- The Hexa Star presented here is my variation on Francis’ basic snowflake. Francis Ow himself designed different variations of his own.
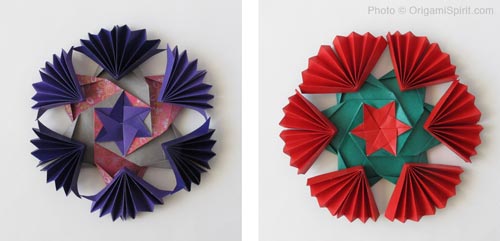
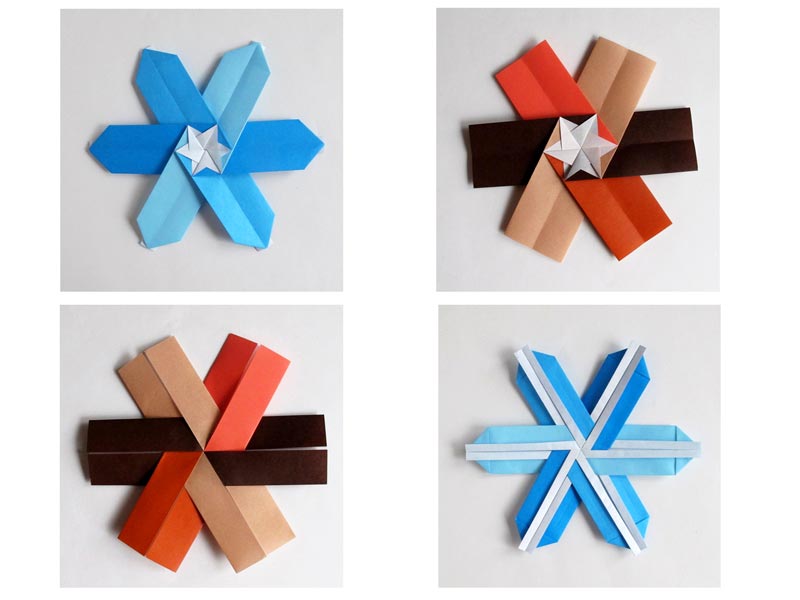
- Following the video, fold some units up to the minute mark 2:02. Try your hand at making variations to the outside edge of each unit and see what you can come up with.
- The photos below show sample variations created by Francis Ow and Hans Werner-Guth.
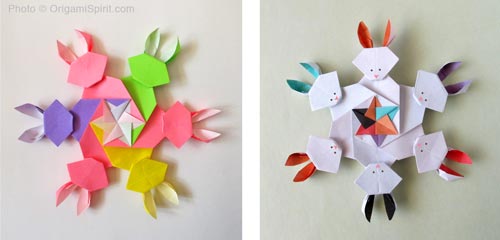
- A tutorial for a Bunny Snowflake based on this module and created by Francis is presented HERE.
Watch the Video
VIDEO – Snowflake and Hexa Star
Share your folds in our FACEBOOK group. Remember that the purpose of sharing them is not only to show beautiful folds. You can also share your challenging attempts and ask questions.
Share your folds in our FACEBOOK group. Remember that the purpose of sharing them is not only to show beautiful folds. You can also share your challenging attempts and ask questions. We are there to help each other!