
When this origami Toy Traffic Light idea popped into my head, I became completely obsessed! What started as a simple “what if” moment turned into a delightful creative binge where I started folding at 8 AM and suddenly it’s 5 PM with my scheduled workday completely neglected.
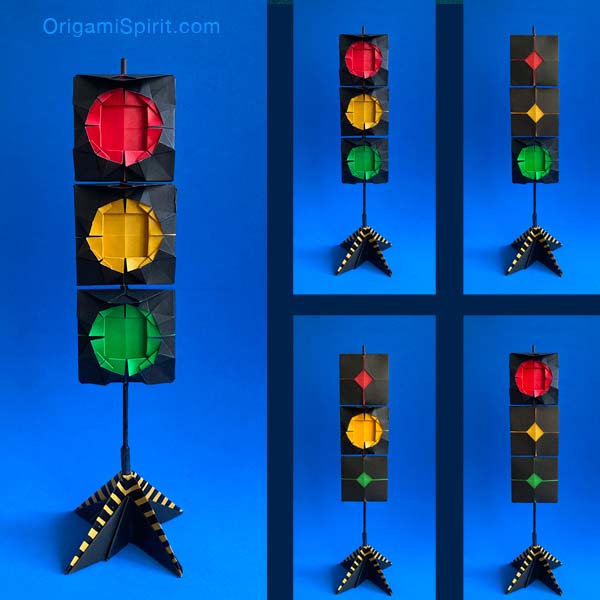
Each of the three colored lights spins independently on a wooden skewer, creating an interactive toy that mimics real traffic signals.
Each light uses two pieces of paper. The frontal module features an ON light, and the back is marked with an OFF light, with a central hint of color. Joined together, they work to create the rotating mechanism. Each light features a triangular visor to evoke the hoods that block sun glare on actual traffic lights.
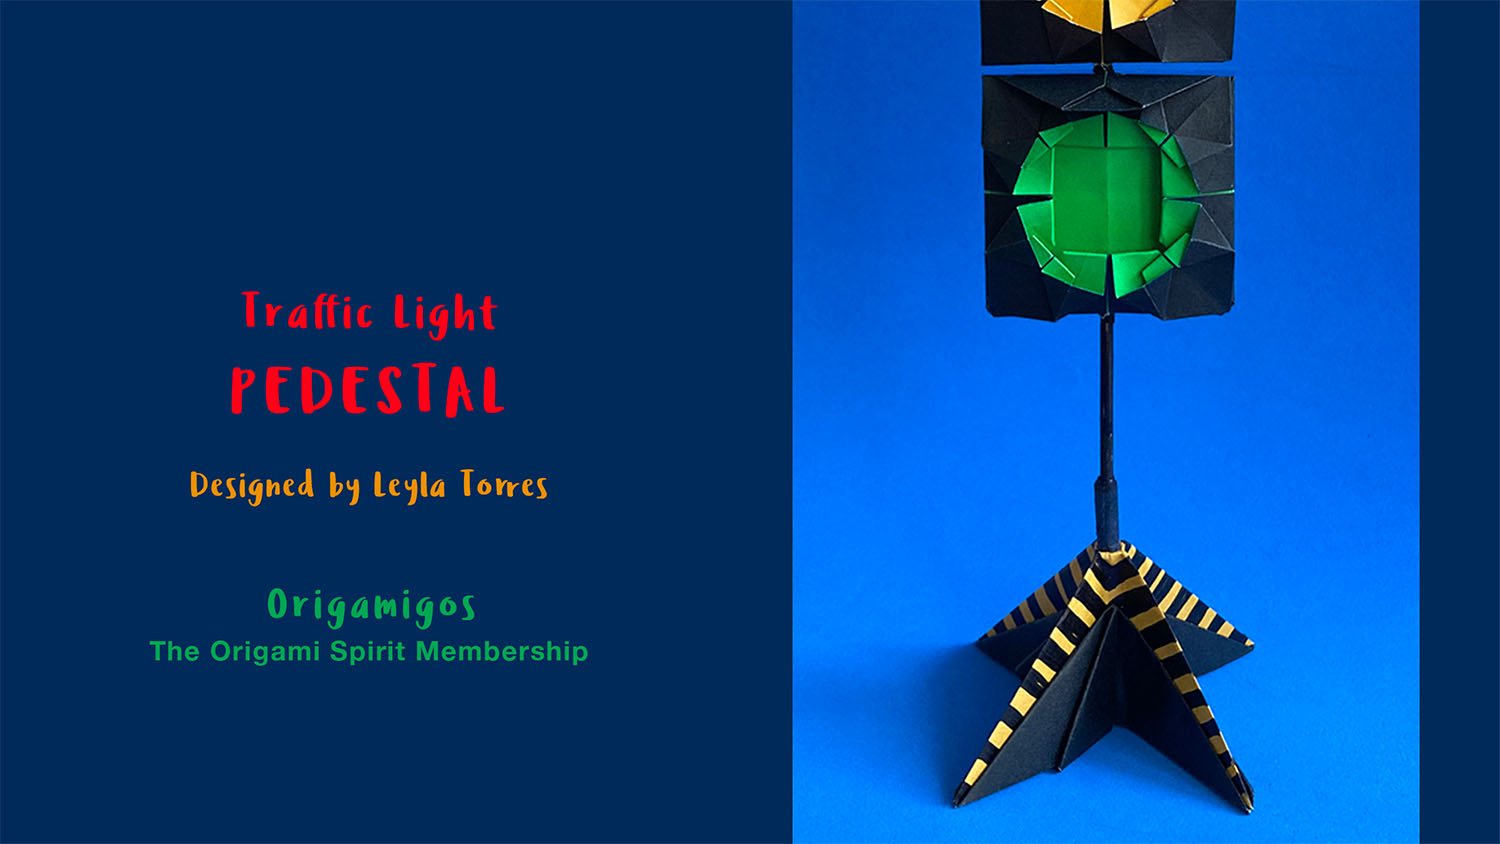
The pedestal is made with one piece of paper, but I added an optional yellow and black accent piece. Why not make it look more “metropolitan,” right?
I kept circling back to the concept of elegant simplicity: no scissors, no glue, just folding and engineering. The only extra element, and a justifiable transgression, is threading a skewer through gently poked holes, which turned out satisfyingly simple.
This Toy Traffic Light is a perfect action model to play with children, spark conversations, or as a unique gift that brings people together!
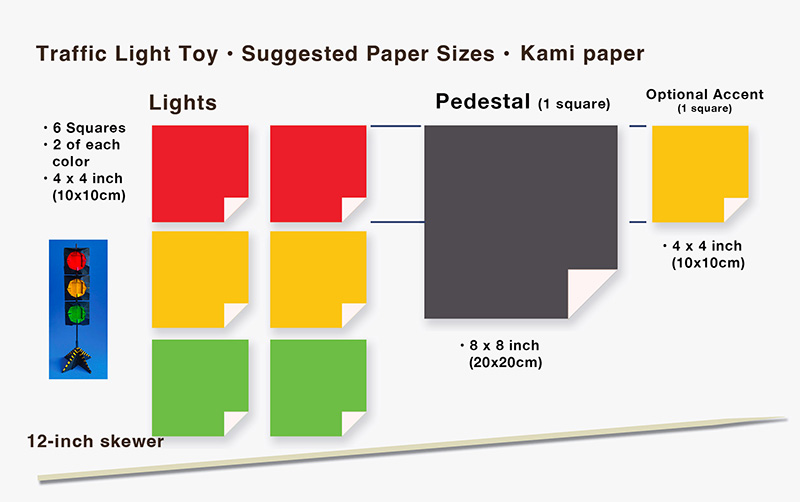
Materials for making the Toy Traffic Light
- IDEAL SIZE PAPER: 4 x 4 inch (10 x 10 cm) square, white or black on one side and colored on the other.
- RED Light: Two red squares (white or black on the reverse side)
- YELLOW Light: Two yellow squares (white or black on the reverse side)
- GREEN Light: Two green squares (white or black on the reverse side)
- Pedestal: A white or black square whose side is double the side of the lights. In this case, 8 X 8 inches (20 x 20 cm)
- EXTRA ACCENT (Optional): 4 x 4 inch (10 x 10 cm) yellow square (white on the reverse side)
- A 12-inch pointy skewer.
- Both sides of the paper will be visible in the finished piece.
Origami terms to note:
- Multi-Piece Origami: It’s a paper folding technique that uses two or more sheets of paper folded in a different way to create a piece.
- Pinch Mark: A tiny mark that is made by folding and used as a guideline.
- Reverse a fold: to turn a fold from a valley into a mountain or the other way around, a mountain into a valley.
- Squash fold: This is when we open or separate two layers of paper, then press and flatten the paper to make the fold.
- Lock: When locking occurs, an area of the paper is fixed at a particular configuration so that it stays in place and cannot be easily unfolded.

If you are at the Apprentice Bee Stage (Stage 1) Make sure that you have had practice folding the traditional windmill base. As a way to practice before you make this toy, you can have some fun by making Froebel Variations (Also known as Windmill Variations).
- Joy of Origami, module 1 Section 5 (PoD 1). Click HERE for the video.

If you are at the Emergent Frog Stage (Stage 2) Keep in mind the previous recommendations for Stage 1. You can use a large piece of copy or printer paper (8 x 8 inches) for your first attempts. Making inside-reverse folds might be a little challenging if you are a novice. Be patient if your first attempts are not successful. Get some preliminary practice by folding the flapping bird. You will be developing your skills at inside-reverse folding.

If you are at the Competent Goldfish Stage (Stage 3) Keep in mind the suggestions given for the previous stages. Take the challenge of unfolding the frontal unit and figuring out what the visible areas are on the finished model. If you have paper with black on one side and white on the other, you can use colored markers to fill those areas.
- For more practice with the windmill base, fold this Heart Frame, and this Heart Box.

If you are at the Ambassador Cat Stage (Stage 4) Keep in mind the suggestions given for previous stages when you are folding this toy. Set a goal of memorizing the steps to make it.
Fold and explore other variations of the windmill base and look for a round look of each light by folding the flaps in different ways as demonstrated in the Joy of Origami, module 1, Section 3. Click here for the VIDEO.

If you are at Pioneer Owl Stage (Stage 5) Keep in mind the suggestions given for stage four. Set yourself the challenge of making the light ON unit without watching the video. Look closely at the photos below and puzzle out how to turn the windmill base into the ON light and how to make the OFF light unit (hint: not from a windmill base).

VIDEO Traffic Light PEDESTAL
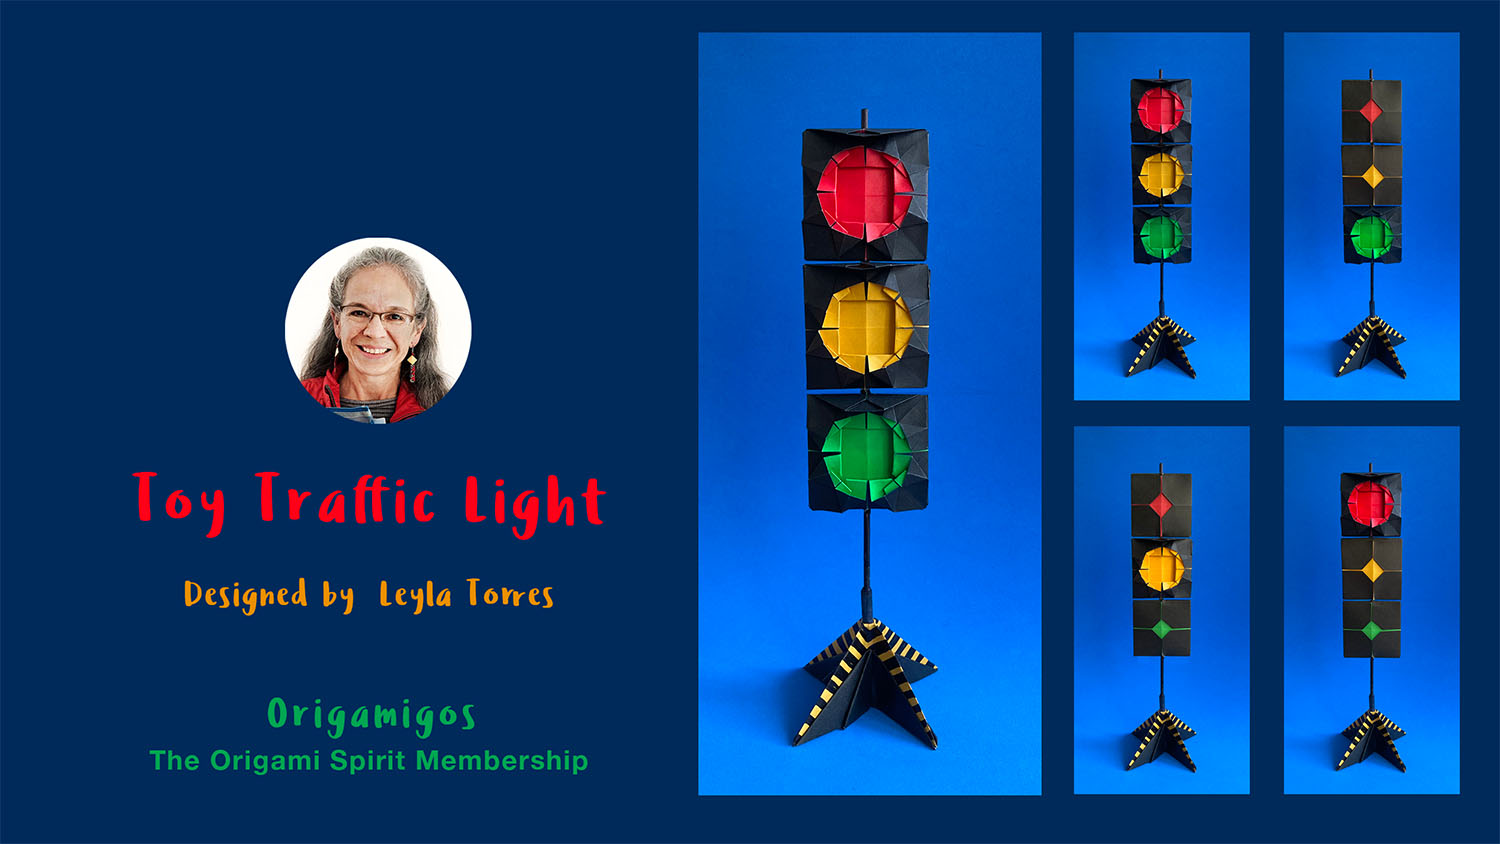
VIDEO Toy Traffic Light
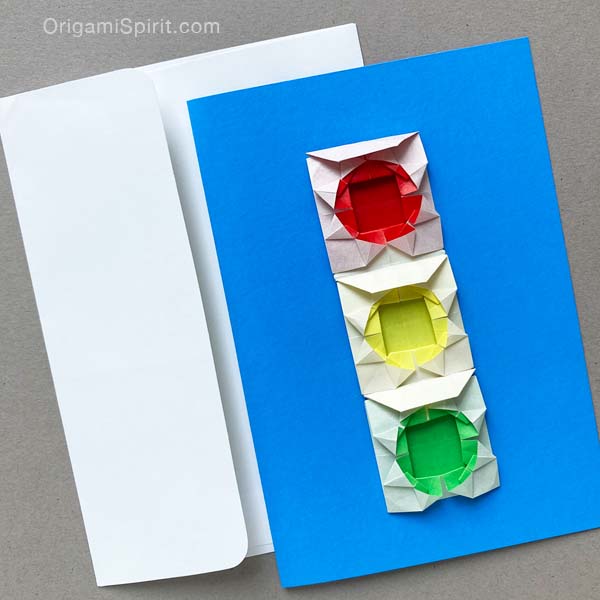
In another post, I share a video for a flat traffic light version, perfect for a greeting card.
The frontal ON Light module is similar, but the lights are connected by smaller pieces. Do you want to challenge yourself to make it?
VIDEO and POST Coming soon. Stay tuned.
Share your folds in our FACEBOOK group. Remember that the purpose of sharing them is not only to show beautiful folds. You can also share your challenging attempts and ask questions. We are there to help each other!